מק"ט יצרן # 2853
ADDRESS LED RING SERIAL RGBW
Adafruit Industries LLC
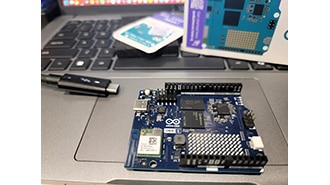
The new Arduino UNO Q is a fascinating combination of microcontroller and single-board computer. With a Qualcomm QRB2210 microprocessor (MPU) and an STM32U585 microcontroller (MCU) on the same board, the UNO Q gives you the horsepower to run modern AI workloads while still offering real-time control on the MCU side.
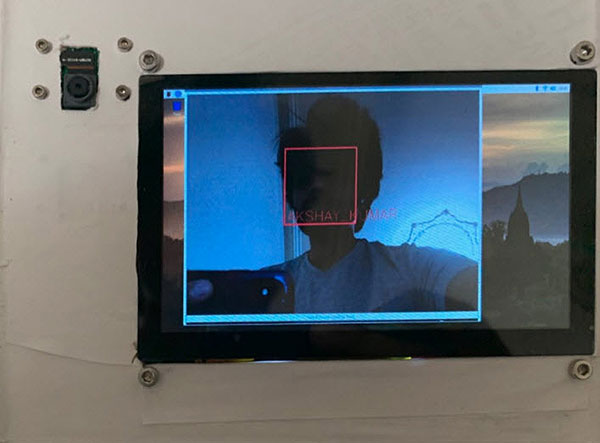
To test this hybrid capability, I built a small robot: a pan/tilt camera head that uses a USB webcam for face tracking and facial-expression recognition (many thanks to Jorvon Moss for creating the mechanical pan/tilt design!). When the robot sees you, it turns to face the largest (ideally nearest) detected face and changes its LED ring color based on the expression it thinks you’re making. Under the hood, the Qualcomm side runs a YOLOv11-nano while the microcontroller drives the servos and LEDs. This results in a robotic “head” that follows you around and reacts to your mood.
I was inspired by Cyril Engmann’s LuxoPi, which he showcased at this year’s Hackaday Supercon. LuxoPi, based on Pixar’s iconic Luxo Jr., is a lamp-like robot that reacts to users' movements, touch, expressions, and sounds. I wanted to demonstrate one part of this, reacting to facial expressions, on low-power hardware, which opens the possibility of running the robot off smaller batteries.
All mechanical (STL) files and code for this project can be found here: https://github.com/ShawnHymel/face-expression-detection-robot.
The Arduino UNO Q sits in a new space between traditional makers’ boards and more complex embedded Linux platforms. On paper, the specs look impressive:
It’s tempting to treat it as a drop-in replacement for any other small Linux SBC: you can boot to a graphical desktop, plug in a keyboard and monitor, and treat it like a tiny computer. However, in practice, the UNO Q shines in headless applications (projects where you do not need a monitor or keyboard).
The MPU is ideal for computationally heavy tasks such as:
Meanwhile, the MCU side gives you what Linux often struggles with: deterministic real-time control. It’s excellent for:
The two processors communicate through Arduino’s new Bridge system, which allows you to delegate fast, real-time tasks to the MCU and heavy computational loads to the MPU. It essentially sets up a remote procedure call (RPC) framework between the two devices, allowing you to call functions from one to the other.
This architecture makes the UNO Q particularly well-suited for robotics, especially if you require complex algorithms, such as vision processing and machine learning, to run on an integrated, low-power board. The face-tracking, expression-recognizing pan/tilt robot is a natural fit, as the MPU can handle image capture and inference while the MCU handles motion and LEDs.
The rest of this post will walk you through building the mechanical mount, retraining the YOLO object detection model, deploying it to the UNO Q, and running the face expression detection script.
If you wish to recreate this project, you will need:
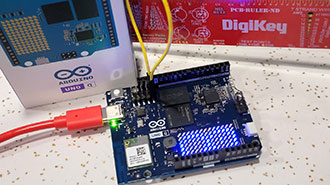
Before you start, I recommend following these instructions to install App Lab, connect the Arduino UNO Q to your computer via USB, and go through the setup process to connect the UNO Q to your WiFi and update the firmware.
Print the STL files on your 3D printer. Assemble the pan/tilt mount as shown.

Connect the power pins of the LED ring and both servos to 5V. Connect the following pins:
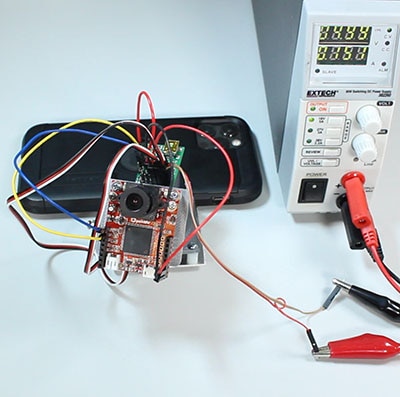
Connect the USB hub to the Arduino UNO Q. Connect the webcam to a USB port on the hub. Connect a USB-C cable to power to the PD port on the USB hub.

If you configured WiFi on the UNO Q, it should power up, connect to your WiFi network, and start an SSH server that you can log into. We’ll use that to upload our code and run our application.
While you might be able to find an off-the-shelf model pre-trained to detect human facial expressions, let’s try retraining our own! This will demonstrate how you can start with a pretrained object detection model, use transfer learning to retrain it to perform a similar task, and then export it in the ONNX format.
Start by downloading this repository: https://github.com/ShawnHymel/face-expression-detection-robot
Assuming you have a CUDA-capable NVIDIA graphics card, you can use the pre-configured Docker image to run Jupyter Lab and PyTorch in a container. Build and run the image with:
docker build -f Dockerfile.gpu -t fed-training-gpu .
docker run --rm -it --gpus all --shm-size=2g -p 8888:8888 -p 6006:6006 -v "${PWD}/workspace:/workspace" fed-training-gpu
With the Jupyter Lab server running, you can click on the URL shown in the terminal (likely the one starting with http://127.0.0.1:8888/lab?token=...) to open a browser for Jupyter Lab.
In Jupyter Lab, open workspace/notebooks/training.ipynb. Follow the instructions as you run through each cell (press shift+enter to run the cell). Note that you will need to create an account on Roboflow and manually download the Human Face Expression dataset.

During the training process, you can connect to TensorBoard by browsing to localhost:6006. You can watch the loss and mAP over time.

Training will take 30+ minutes (depending on your GPU) and should ultimately produce a trained model at workspace/models/model_with_nms.onnx.
Now, we'll copy the firmware project to the UNO Q and run it. Copy workspace/models/model_with_nms.onnx to firmware/face-detection-robot/model_with_nms.onnx.
Open a terminal (to be used as your SSH connection to the UNO Q). Enter the following (replace <UNO_Q_IP_ADDRESS>
ssh arduino@ssh arduino@<UNO_Q_IP_ADDRESS>
Enter yes if asked to accept the SSH key fingerprint. Enter your UNO Q password.
In that terminal, create a new project folder on the UNO Q:
mkdir -p ~/ArduinoApps/face-detection-robot
From your host computer, open up a new terminal, navigate into this directory, and run the following (replace <UNO_Q_IP_ADDRESS>
scp -r firmware/face-detection-robot/ arduino@<UNO_Q_IP_ADDRESS>:~/ArduinoApps
Now, we can use the Arduino App CLI to run and control apps. To start your program, run the following in the SSH terminal (connected to your UNO Q):
arduino-app-cli app start ~/ArduinoApps/face-detection-robot
Browse to <UNO_Q_IP_ADDRESS>

You can check the logs with:
arduino-app-cli app logs ~/ArduinoApps/face-detection-robot
You can stop the application with:
arduino-app-cli app stop ~/ArduinoApps/face-detection-robot
You might notice that the model does not detect some of your facial expressions. For me, it found “surprise” and “happy” easily, but struggled with the others. This is likely due to a combination of several factors, including data and model complexity (we’re using the smallest available YOLOv11). I recommend trying the following to increase the model accuracy:
Object detection can be tricky, and lighting (or other environmental factors) can kill your accuracy. I hope this demo gets you started developing other edge AI and robotics projects with the Arduino UNO Q!
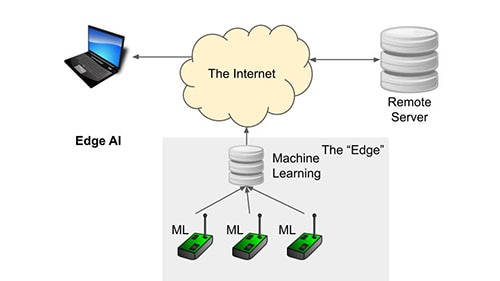
If you’d like to learn more about edge AI, check out this video.